Heat Pump Pipework: What's Involved?
The pipework connecting your heat pump to your home carries every unit of heat the system produces — and poor pipework can waste 10-15% of it before it even reaches a radiator. Getting the pipework right is one of the details that separates a great installation from a mediocre one.
This guide explains what pipework a heat pump needs, how it is routed, why insulation quality matters so much, and what to look out for on installation day.
Get a quote that includes properly specified pipework
Get free quotes from MCS-certified installersQuality installers take pipework seriously — it shows in the quote detail.
What Pipework a Heat Pump Needs
A heat pump installation involves several pipework elements:
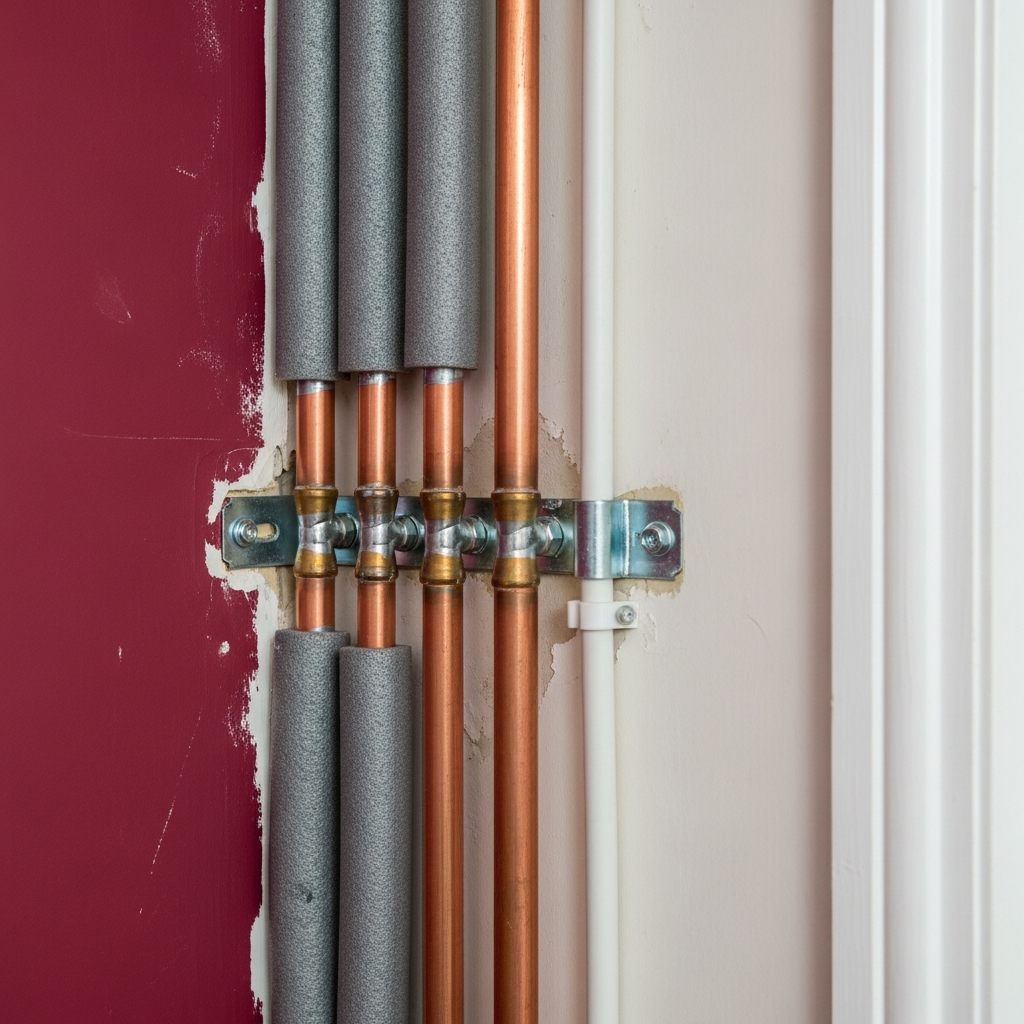
- Flow and return pipes: These carry heated water from the heat pump to the indoor system and return cooled water back. Typically 22mm or 28mm copper
- Heating circuit: The existing pipework to your radiators or underfloor heating (usually 15mm or 22mm)
- Hot water circuit: Pipes connecting the heat pump to the hot water cylinder
- Condensate drain: A small drain pipe from the outdoor unit for defrost water
- Safety valve discharge: Pipework for the pressure relief valve
| Circuit | Pipe size | Material |
|---|---|---|
| Flow/return to heat pump (small systems) | 22mm | Copper |
| Flow/return to heat pump (larger systems) | 28mm | Copper |
| Heating circuit (radiators) | 15mm or 22mm | Copper (existing) |
| Hot water cylinder connections | 22mm or 28mm | Copper |
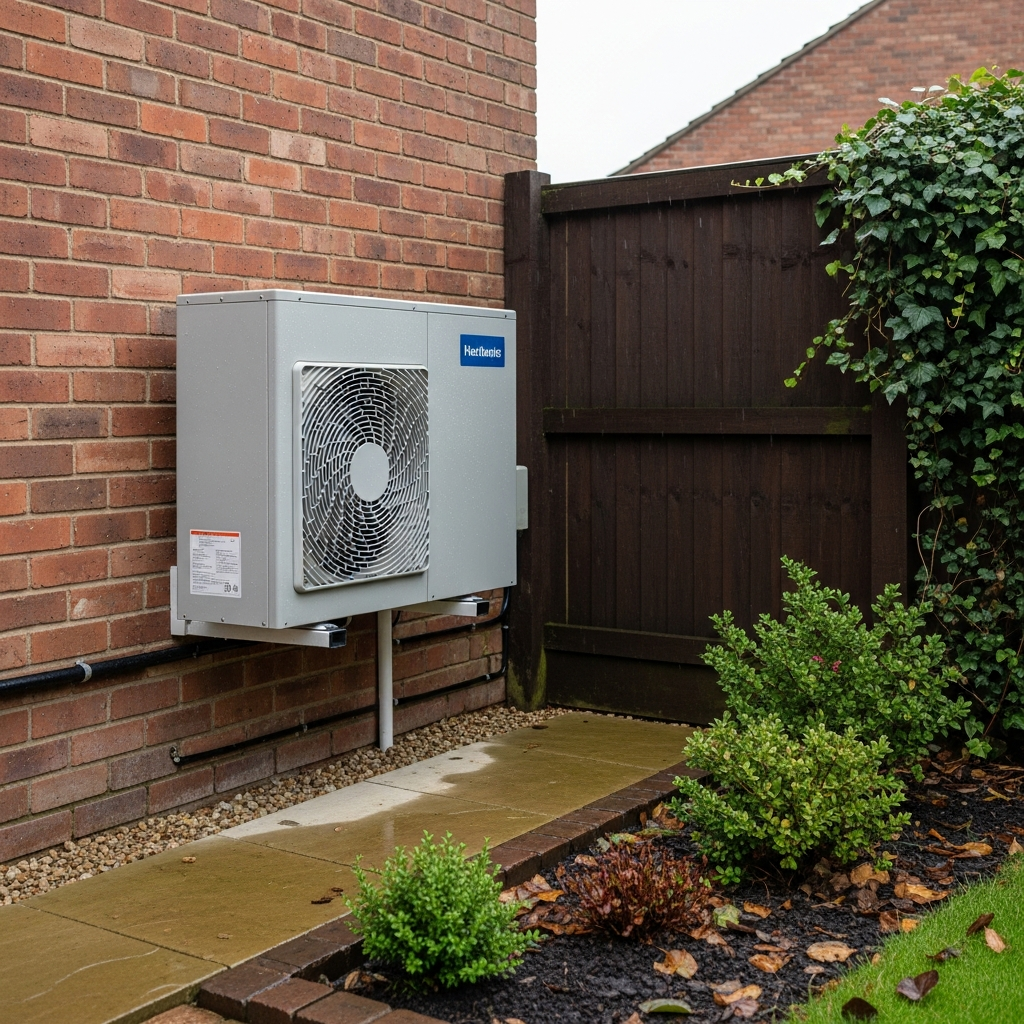
The Wall Penetration
The flow and return pipes need to pass through your external wall to connect the outdoor heat pump unit to the indoor system. This requires a core hole — a neat, round hole drilled through the brickwork.
- Size: Typically 50-80mm diameter (about the size of a tennis ball)
- Drilling time: 20-30 minutes using a diamond-tipped core drill
- Location: As close to the heat pump unit as possible to minimise pipe length
- Sealing: Expanding foam around the pipes, with a decorative wall plate covering the hole
This is the noisiest part of the entire installation, but it is over quickly.
Routing Options
How the pipes get from the wall penetration point to the indoor system depends on your property layout:
- Direct route through one wall: The simplest option. Heat pump on one side, cylinder and heating system on the other. Minimal pipework, minimal disruption
- Through a garage or utility room: Common when the heat pump is at the side of the house and the heating system is at the back
- Under floorboards: Used when pipes need to cross the house without being visible. Involves lifting some floorboards
- Through the loft: Sometimes used for upper-floor heating circuits
- External trunking: Pipes can run along the outside wall in an insulated duct before entering through a second penetration closer to the indoor system
Longer pipe runs cost more and lose more heat — even with good insulation. This is one reason why the positioning of the outdoor unit is planned carefully during the survey stage.
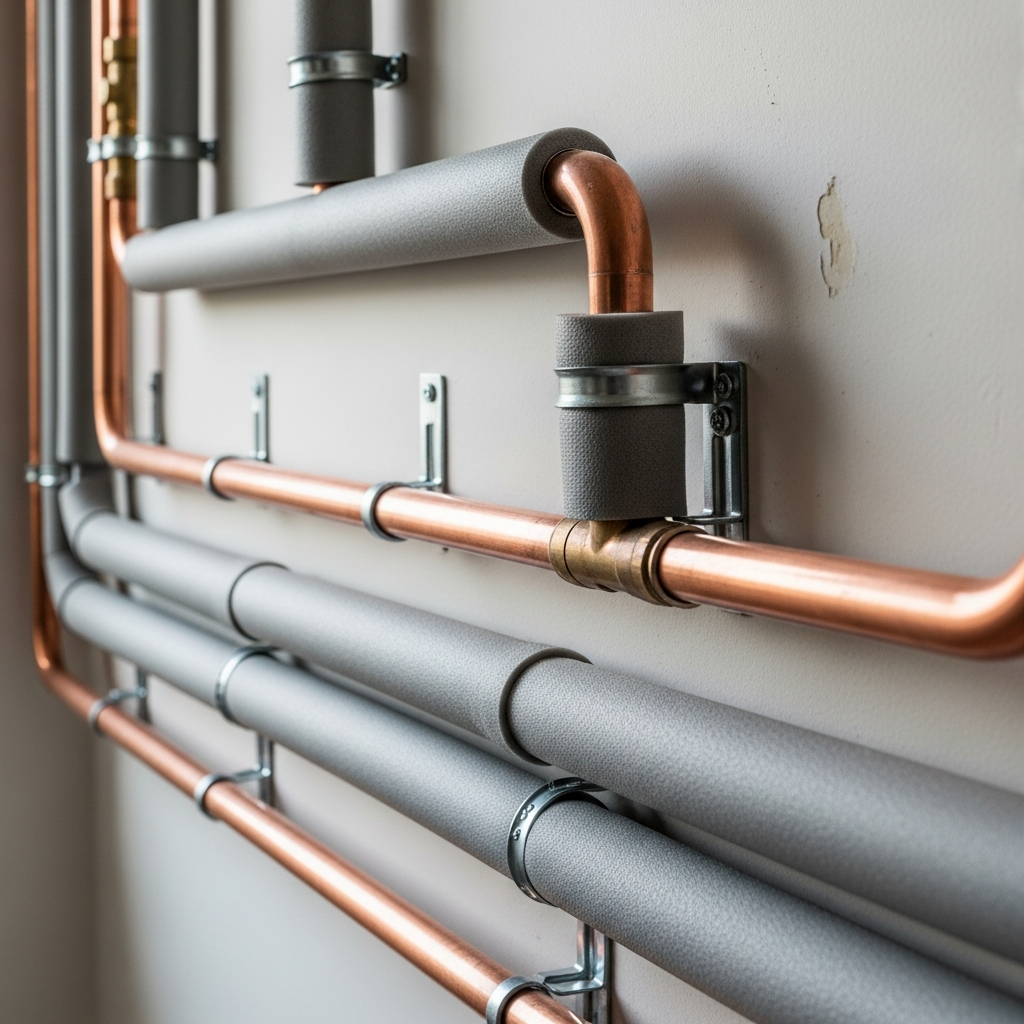
Why Insulation Is Critical
Heat pumps operate at lower temperatures than boilers (typically 35-45°C versus 60-80°C). At these lower temperatures, every degree of heat loss matters more — there is less margin for waste. Poor pipe insulation can reduce your heat pump's effective efficiency by 10-15%.
Minimum insulation
19mm
The bare minimum for external pipework — adequate but not ideal
Recommended insulation
25mm
Best practice for external pipework — significantly reduces heat loss
UV protection
Essential
Outdoor insulation must be UV-resistant or protected with cladding
Ask your installer to show you the pipe insulation before it is covered or boxed in. This is one of the easiest quality checks you can do during the installation.
Concerned about installation quality?
Estimate your costs firstThen compare quotes from MCS-certified installers who take the details seriously.
Using Existing Pipework
In most heat pump installations, the existing heating pipework inside your home is reused. The pipes connecting your radiators are typically 15mm copper, which works well with a heat pump system. However:
- System flush: The existing pipework must be thoroughly flushed to remove sludge and debris that has built up over years
- Inhibitor: Fresh corrosion inhibitor is added to protect the system
- Condition check: Severely corroded or leaking pipes need replacing
- Pipe sizing: In some cases, pipes may need upsizing if the system requires higher flow rates than the existing setup can deliver
See our guide on existing heating system compatibility for more detail on what can be reused.
Pipework Costs
Pipework costs are included in your overall installation quote. As a rough guide:
These are rough indications — your installer will include the exact pipework specification in their itemised quote. Combining with solar panel installation at the same time can sometimes share routing costs where both systems use similar pathways.
Frequently Asked Questions
What type of pipes are used for heat pumps?
Most UK installations use copper pipework for the flow and return between the outdoor unit and indoor system. Pipe sizes are typically 22mm or 28mm depending on the heat pump output. The heating circuit inside the house usually uses existing 15mm or 22mm copper pipes.
Why is pipe insulation so important for heat pumps?
Heat pumps operate at lower temperatures than boilers, so every degree of heat lost through uninsulated pipework has a bigger impact on efficiency. External pipework must be heavily insulated (at least 19mm, ideally 25mm thick) and protected from UV degradation and weather.
How big is the hole drilled through the wall?
The core hole is typically 50-80mm in diameter. It is neatly sealed around the pipes with expanding foam and a wall plate after installation.
Can heat pump pipes be hidden?
Yes. External pipes can be run in trunking or a duct for a neater appearance. Internal pipes can be routed under floors, through walls, or boxed in. Discuss routing options with your installer during the survey.
Get a properly detailed installation quote
Request free quotes todayQuality installers specify pipework sizes, insulation grades, and routing in their quotes.
About Heat Pump Pipework Standards
Pipework quality is a critical but often overlooked factor in heat pump installation efficiency. MCS installation standards require proper pipe sizing, adequate insulation, and correct routing to minimise heat loss and maximise system performance. Copper remains the standard material for UK heat pump installations due to its excellent thermal conductivity and durability. Well-insulated pipework ensures that the heat your pump generates reaches your radiators efficiently, keeping running costs low and contributing to the UK's broader energy efficiency targets alongside solar energy generation.