Heat Pump Commissioning: Final Steps Explained
Commissioning is the moment of truth — it is where your installer proves the system works as designed. It is the formal process of testing, adjusting, and verifying every aspect of your heat pump installation. Skip it or rush it, and you risk years of underperformance, higher bills, and comfort problems that could have been caught in an afternoon.
This guide explains what happens during commissioning, what your installer should check, what questions to ask, and what documentation you should receive at the end.
Ensure your installation includes proper commissioning
Get free quotes from MCS-certified installersMCS certification guarantees thorough commissioning as part of every installation.
What Is Commissioning?
Commissioning is an MCS requirement — every MCS-certified installation must be formally commissioned before the system is handed over. It is the process of verifying that the system delivers the performance it was designed for, with all safety systems working correctly.
It typically takes 3-5 hours and happens on the final day of the installation. Some installers prefer to commission on a separate day, allowing the system to settle overnight first.
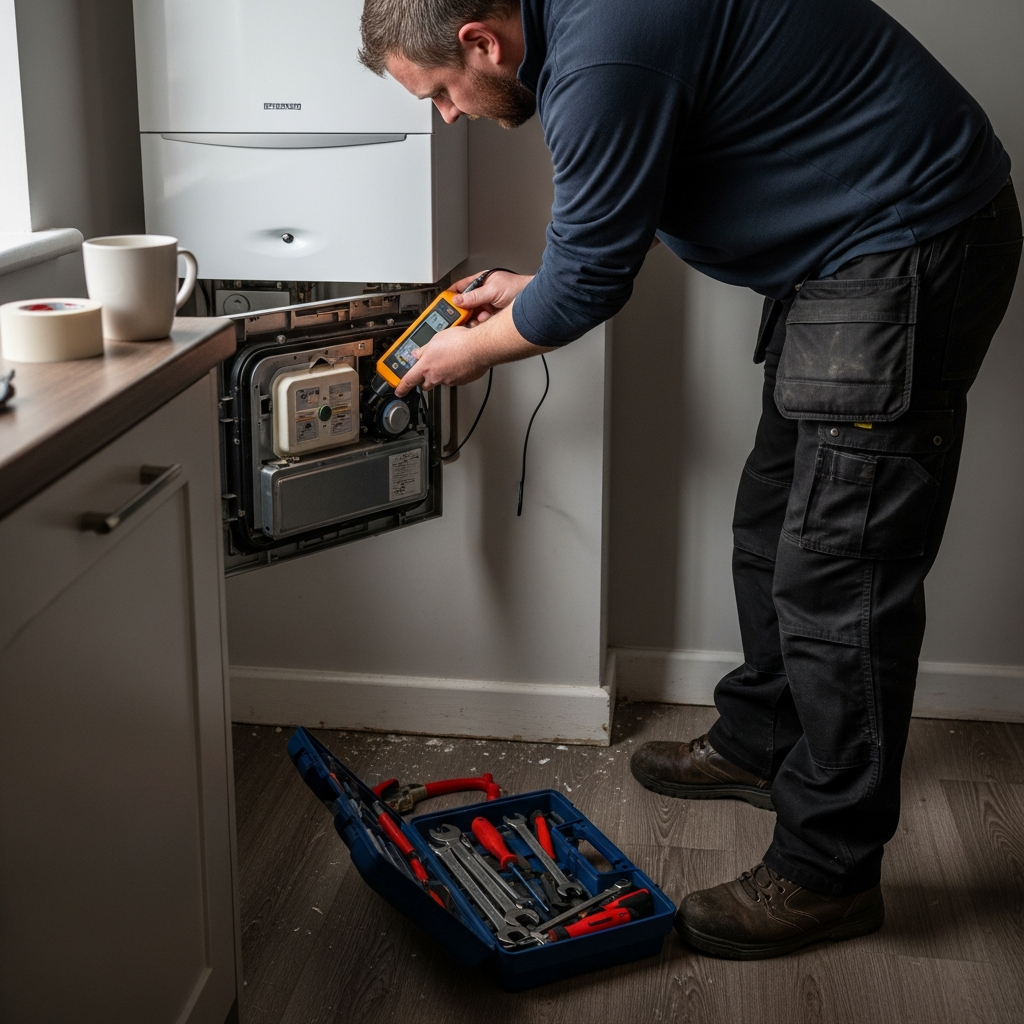
What Your Installer Checks
| Check | What they verify | Target values |
|---|---|---|
| Flow temperature | System delivers heat at designed temperature | 35-45°C (radiators) |
| Return temperature | Temperature drop across the system is correct | 5-8°C lower than flow |
| Hot water | Cylinder reaches target temperature | 48-55°C normal, 60°C pasteurisation |
| System pressure | Stable at operating pressure | 1.0-1.5 bar typically |
| Noise levels | Outdoor unit within permitted limits | 42dB at 1m (typical) |
| Electrical safety | All connections safe, Part P compliant | Pass/fail |
| Weather compensation | Outdoor sensor fitted, heating curve set | Curve matched to property |
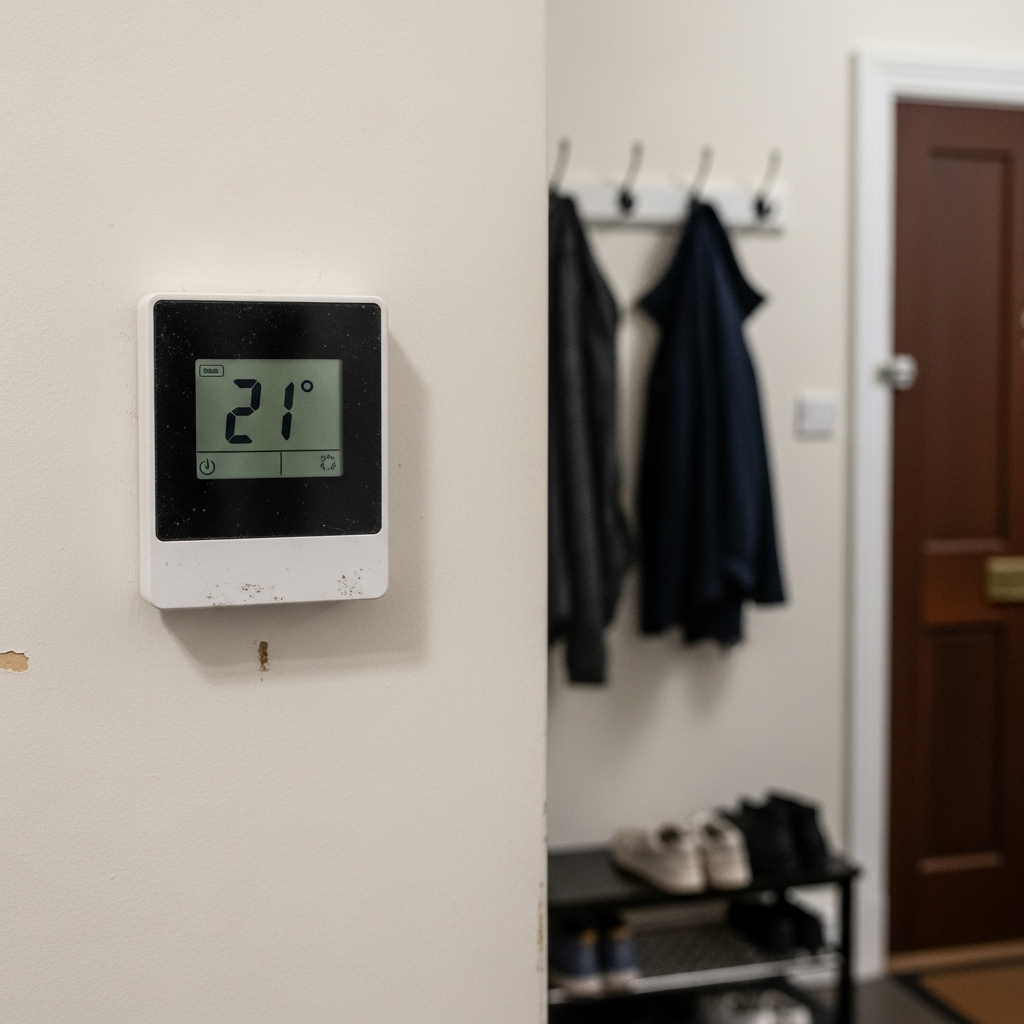
Weather Compensation Setup
This is arguably the most important commissioning step. Weather compensation uses an outdoor temperature sensor to automatically adjust how much heat the system produces. On a mild 10°C day, it reduces output to save energy. On a freezing -5°C day, it increases output to maintain comfort.
The installer sets a "heating curve" — a relationship between outdoor temperature and flow temperature. Getting this right is crucial for both comfort and efficiency. It may need fine-tuning over the first few weeks as you and the system learn each other.
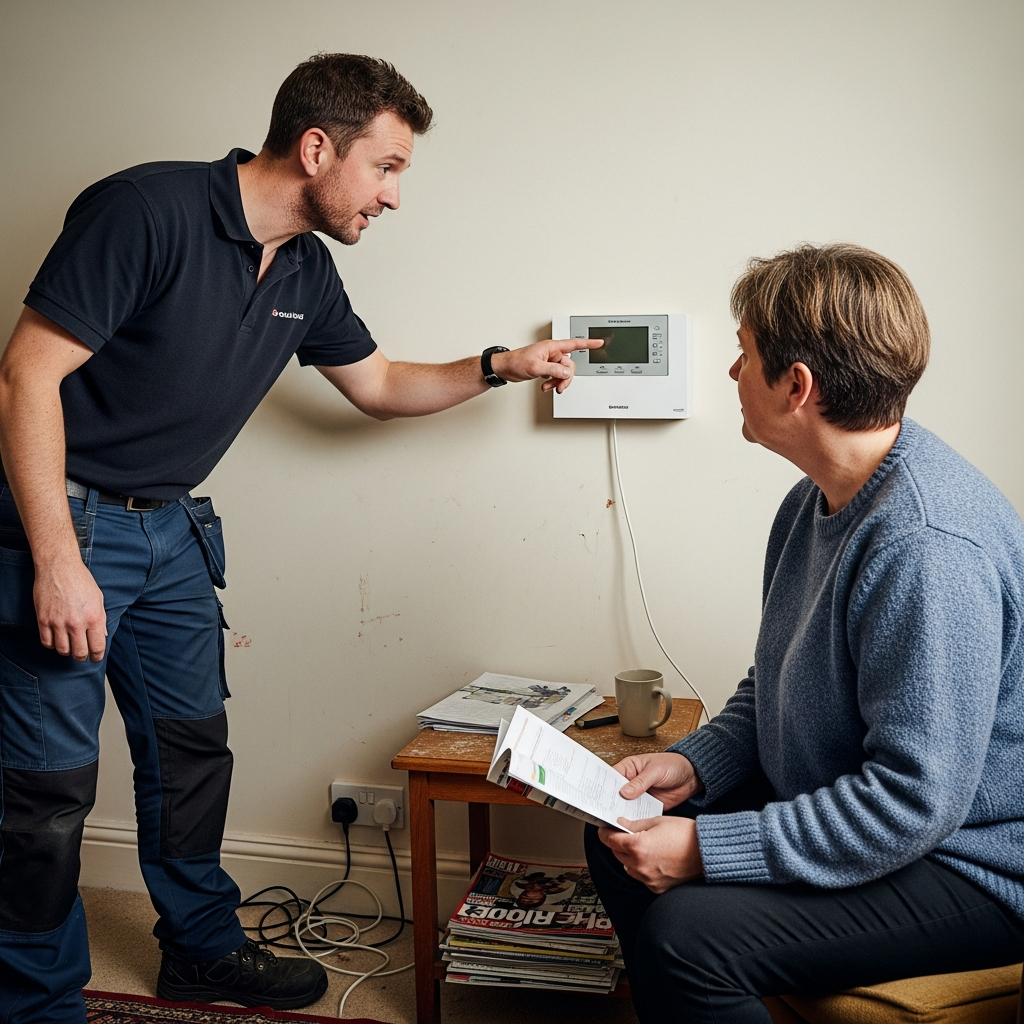
The Handover Process
After commissioning, the installer walks you through how the system works. A good handover covers:
- How to adjust the thermostat and set schedules
- How hot water heating works and when it runs
- What the normal system pressure should read
- What weather compensation does and why not to override it
- What defrost cycles look and sound like (so you do not worry)
- How to top up system pressure if it drops
- When to book the first annual service
- Emergency contact details for urgent issues
Want to understand costs before commissioning day?
Try the free calculatorKnow what to expect financially before your installation begins.
Documentation You Should Receive
- MCS installation certificate: Proof the installation meets MCS quality standards
- Commissioning record: All measured values documented
- Manufacturer warranty: Typically 5-10 years for the heat pump unit
- Building regulations certificate: Or notification through the Competent Persons Scheme
- Heat loss calculations: The design documentation for your system
- User guide: Instructions for your specific controls
- Service schedule: When annual servicing is due
Keep all of these documents safe — they are needed if you ever sell the property or make a warranty claim.
After Commissioning
The first few weeks are an adjustment period. Your installer may offer a follow-up visit at 4-6 weeks to fine-tune the weather compensation curve and check everything is running smoothly. Take advantage of this — it is part of what you are paying for.
Resist the urge to override settings. If a room feels too cold or too warm, note it for the follow-up visit rather than cranking the thermostat. The system needs time to find its rhythm. Homeowners who pair their heat pump with solar panels can further optimise by scheduling hot water heating during peak solar generation hours.

Frequently Asked Questions
How long does commissioning take?
Commissioning typically takes 3-5 hours. Some installers prefer to do it on a separate day from the main installation to allow the system to settle.
What is weather compensation?
Weather compensation automatically adjusts the heat pump's output based on the outdoor temperature. An external sensor tells the system how cold it is outside, and the heating curve determines how much heat to produce.
Should I change any settings after commissioning?
No — leave the settings as your installer configured them for at least 2-4 weeks. If something feels wrong, contact your installer rather than adjusting settings yourself.
What if commissioning reveals a problem?
Your installer must resolve any issues before formally signing off. Common findings include radiators needing rebalancing, air locks needing purging, or weather compensation curves needing adjustment. These are normal and should be resolved on the day.
Ensure your installation includes thorough commissioning
Get quotes from MCS-certified installersMCS standards require proper commissioning — cutting corners is not acceptable.
About Heat Pump Commissioning Standards
Heat pump commissioning is governed by MCS standard MIS 3005, which sets out the requirements for system testing, verification, and documentation. Proper commissioning ensures the system delivers its designed efficiency, reducing energy waste and maximising homeowner savings. The commissioning process is closely linked to the Boiler Upgrade Scheme grant requirements and parallels similar processes in solar panel installations. Thorough commissioning is the foundation of a heat pump system that performs well for its full 20-25 year lifespan.