Air Source Heat Pump Installation: What to Expect
A well-planned air source heat pump installation takes 2-4 days and transforms your home heating for the next 20-25 years. Knowing what happens at each stage — from the initial survey to commissioning — helps you prepare properly and avoid common pitfalls.
Getting an air source heat pump installed is a bigger job than swapping a gas boiler — but it is not the dramatic upheaval many people fear. A typical installation takes 2-4 days, and most of the work happens outside or in the utility area of your home.
Knowing what to expect at each stage helps you prepare properly and makes the whole process smoother. This guide walks through everything from the initial survey to the moment you take control of your new heating system.
Find MCS-certified installers in your area
Get free quotesNo obligation. Compare up to 3 quotes from vetted, experienced installers.
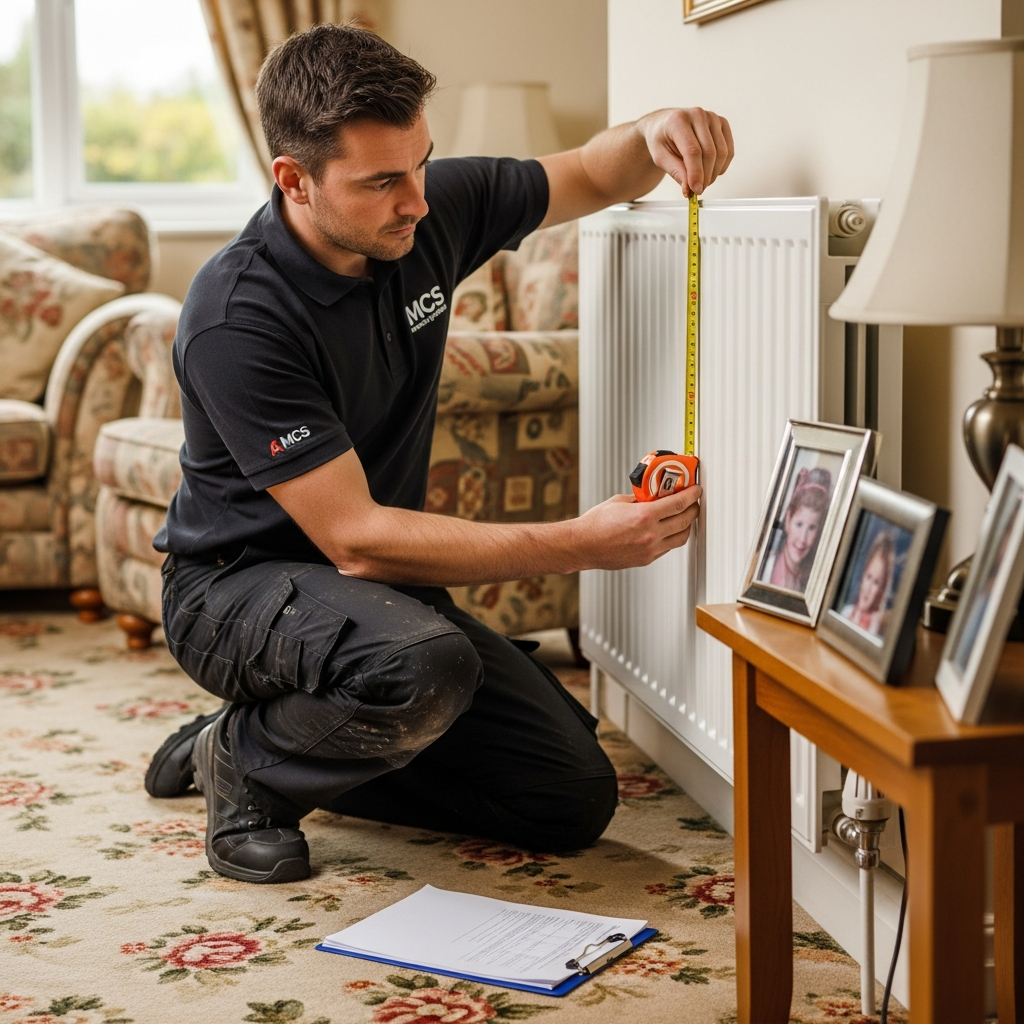
Before Installation: The Home Survey
Before any work begins, an MCS-certified surveyor will visit your property. This is the most important stage of the entire process — a poor survey leads to a poorly designed system, and that leads to high bills and a cold house.
What the Surveyor Does
- Measures every room: Height, width, length, plus window sizes and types
- Assesses insulation: Wall type (cavity, solid, timber frame), loft insulation depth, window glazing type, floor insulation
- Performs a heat loss calculation: Using your room measurements and insulation data, the surveyor calculates exactly how much heat your home loses on the coldest days. This determines the size of heat pump you need
- Checks existing heating: Your current radiators are measured and assessed to determine whether they can deliver enough heat at lower flow temperatures
- Assesses outdoor unit location: Where the heat pump will sit, distance from boundaries, noise considerations, distance to indoor components
- Checks electrical supply: Whether your consumer unit can accommodate a new high-power circuit
- Identifies hot water cylinder location: Where the new cylinder will go (if you do not already have one)
A thorough survey takes 2-3 hours. Be wary of any installer who spends less than an hour — they are not doing the job properly. For more on what a proper survey involves, read our sizing guide.
The Design Package
After the survey, you should receive a detailed design proposal including:
- Heat loss calculation results
- Recommended heat pump make, model, and size
- Hot water cylinder specification
- Any radiator changes needed (with specific radiator recommendations)
- Estimated annual running costs
- Total installation cost (including the BUS grant deduction)
- Projected timescale
This is your opportunity to ask questions and compare proposals from different installers. For help understanding the costs involved, see our detailed cost breakdown.
Preparing Your Home
Before installation day, there are a few things you can do to help:
- Clear the outdoor area: Remove any furniture, plants, or obstacles from where the outdoor unit will be positioned. The installers need a clear working space of at least 2m x 2m
- Clear the indoor area: If you are having a new hot water cylinder, make sure the designated space is cleared
- Protect flooring: Installers will use dust sheets, but if you have particularly precious flooring, consider additional protection
- Prepare for no heating: There will likely be a period (usually 1-2 days) where your old system is disconnected and the new one is not yet running. Plan accordingly — have portable heaters available if installing in winter
- Inform neighbours: The installation involves some noise and possibly a delivery lorry. A quick heads-up is courteous
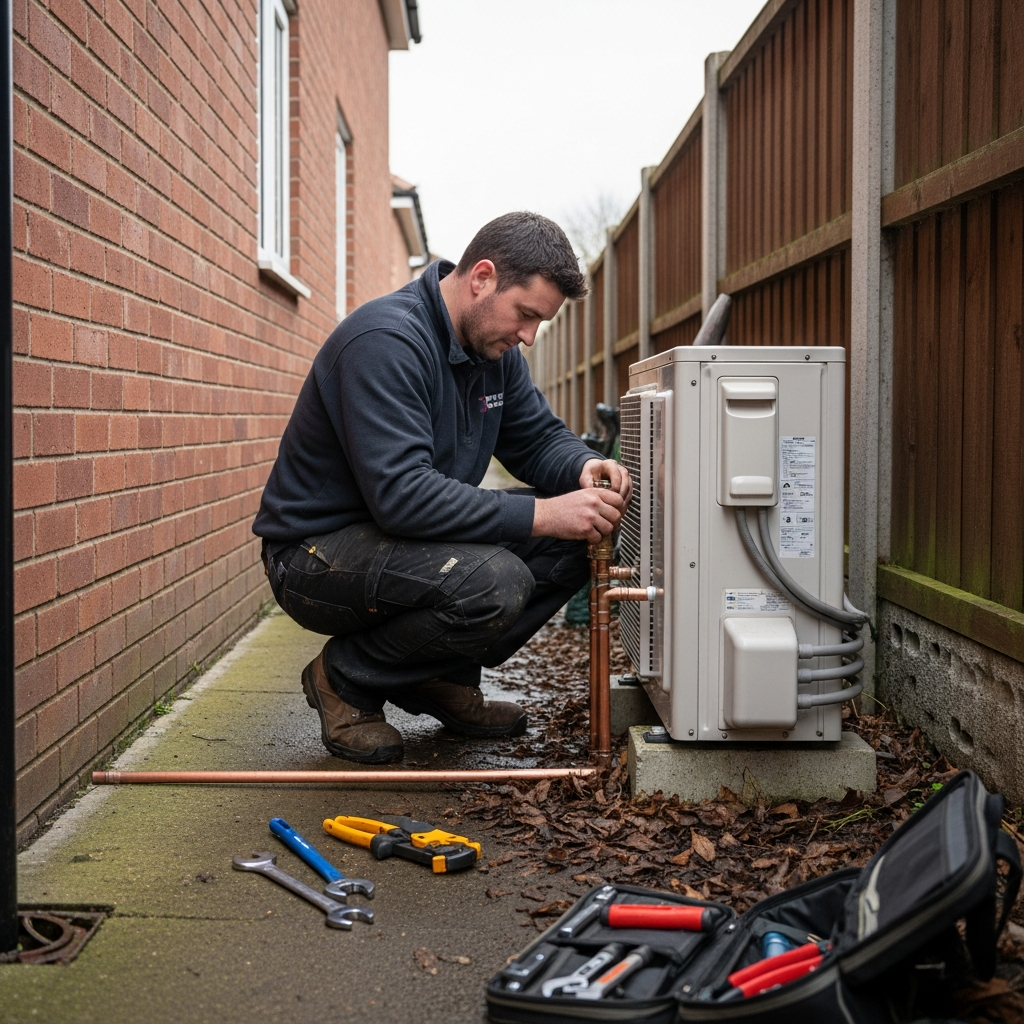
Day 1: Groundworks and Outdoor Unit
The first day typically focuses on the outdoor unit and major physical work.
Morning
- Delivery: The heat pump unit, cylinder, and materials arrive. A heat pump outdoor unit weighs 60-120 kg, so it arrives on a pallet and is moved into position using a trolley or, for difficult access, a crane
- Concrete base: If not already prepared, the team pours or positions a concrete pad for the outdoor unit. Some installations use anti-vibration mounts on an existing hard surface instead
- Outdoor unit positioning: The heat pump is lifted onto its base and secured. It needs to be level, stable, and positioned with adequate clearance for airflow
Afternoon
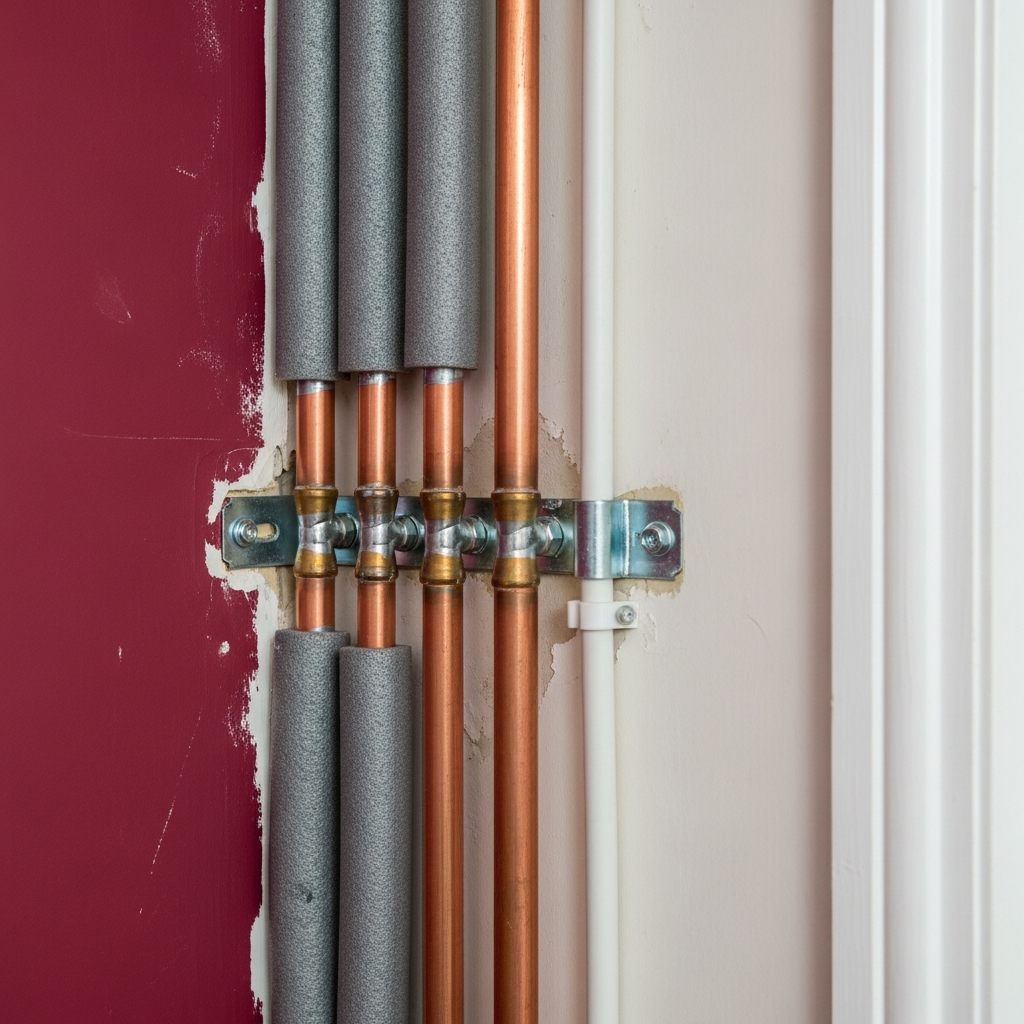
- Pipework routing: Pipes are run from the outdoor unit to the indoor components. This usually involves drilling through an external wall. The pipes are insulated and clipped neatly
- Old system disconnection: If your existing boiler is being removed, this usually happens on day 1. The heating system is drained down and the boiler disconnected
- Cylinder installation: The new hot water cylinder is positioned and plumbed in. If you already have a suitable cylinder, this step may be skipped
By the end of day 1, the outdoor unit should be in position and the major pipework runs completed. You will likely have no heating at this point.
2-4 days
typical installation
from start to commissioning
2-3 hours
home survey
room-by-room heat loss assessment
24-48 hrs
without heating
during the changeover period
30+ mins
handover
training on your new system
Day 2: Connections and Pipework
The second day is usually the most labour-intensive, with the focus on connecting everything together.
- Pipework connections: Connecting the heat pump to the heating system — linking the outdoor unit to the indoor hydraulic module, the cylinder, and the existing radiator circuit
- System components: Installing the buffer tank or low-loss header (if required), expansion vessel, filters, and valves
- Radiator modifications: If any radiators need replacing or adding, this work happens on day 2. New thermostatic radiator valves (TRVs) may also be fitted
- Electrical work: An electrician installs the dedicated circuit from the consumer unit to the heat pump, plus any control wiring between components
By the end of day 2, the system should be physically complete — all components connected, pipework tested for leaks, and electrical connections made.
Day 3: Filling, Testing, and Commissioning
This is the critical day where the system comes to life.
System Fill and Pressure Test
- The heating system is flushed to remove any debris from the old system and new pipework
- Fresh inhibitor-treated water is pumped through the system
- The system is pressurised and checked for leaks at all connections
- Radiators are bled to remove trapped air
Commissioning
Commissioning is the process of starting the heat pump and optimising its settings. This is where installer skill really matters. A well-commissioned system runs efficiently and keeps you comfortable. A poorly commissioned system wastes energy and money.
- Initial start-up: The heat pump is powered on and run through its start-up sequence
- Flow rate checks: The installer verifies that water is flowing through the system at the correct rate
- Weather compensation curve: The relationship between outdoor temperature and flow temperature is set. This is one of the most important settings for efficiency
- Hot water settings: Temperature, timing, and legionella pasteurisation cycles are configured
- Zone settings: If you have multiple heating zones, each is configured and tested
Handover
The installer should spend at least 30 minutes explaining how your new system works. Key things they should cover:
- How to use the controller and thermostat
- Why heat pumps work differently from boilers (run for longer, lower temperatures)
- How weather compensation works and why you should not override it
- What normal operation looks and sounds like
- What to do if there is a problem
- Maintenance requirements
- All documentation: MCS certificate, warranty information, user manuals
Get a personalised cost estimate before requesting quotes
Use the free calculatorBased on your property size, insulation, and current heating system.
Day 4 (If Needed): Snagging and Final Adjustments
More complex installations — particularly those involving extensive radiator work, multiple zones, or underfloor heating — may require a fourth day for completion. Some installers also return after a few days to check system pressures and make fine adjustments once the system has run for a while.
Disruption: An Honest Assessment
We will be straight with you — an air source heat pump installation is more disruptive than a boiler swap. Here is what to realistically expect:
- Noise: Drilling through walls, hammering, and general construction noise for 2-3 days
- Dust: Drilling and pipework creates dust, though good installers use dust extraction and clean up thoroughly
- No heating: Typically 24-48 hours without heating while the changeover happens. In winter, you will need backup heating
- No hot water: Usually no more than 24 hours without hot water
- Access needed: The installers need access to the outdoor area, the room containing the cylinder, and potentially loft spaces and multiple rooms if radiators are being changed
- Delivery vehicles: Expect a van and possibly a small lorry on day 1
However, the disruption is temporary and manageable. Most homeowners describe it as "less bad than expected."
Choosing an Installer
The quality of your installation depends more on the installer than on the heat pump brand. A good installer with a mid-range heat pump will outperform a poor installer with a premium brand every time. For brand comparisons, see our best air source heat pumps guide.
Essential criteria:
- MCS certification: Non-negotiable. Required for the BUS grant and a minimum quality standard
- Heat pump experience: Ask how many they have installed. Ideally 50+ installations
- Proper survey: They must do a room-by-room heat loss calculation, not estimate based on floor area alone
- References: Ask for contact details of recent customers you can speak to
- Detailed quote: The quote should itemise every component and cost, not just give a single figure
- Warranty: Understand what the installer's workmanship warranty covers, in addition to the manufacturer's equipment warranty
Use our free quote service to be matched with vetted, MCS-certified installers in your area, or read our installation guide page for more advice on choosing the right installer.

After Installation: The First Few Weeks
The transition from a gas boiler to a heat pump requires a change in mindset. Here are the key things to know:
- Leave it running: Heat pumps work best when they run for extended periods at low output. Resist the urge to switch it on and off like a boiler
- Lower temperatures are normal: Your radiators will feel warm, not hot. This is by design — the heat pump is delivering a steady, lower-temperature heat rather than short blasts of very hot water
- Trust weather compensation: The system automatically adjusts to outdoor temperature changes. Overriding it usually makes things worse, not better
- Hot water takes longer: Reheating a cylinder from cold takes longer than a boiler. Set your hot water schedule to reheat before peak demand times
- Monitor your consumption: Most heat pump controllers show energy consumption data. Track it for the first few months so you can spot any issues early
For real-world owner experiences of the transition, read our owner reviews.
Frequently Asked Questions
How long does installation take?
Most installations take 2-4 days. A simple swap in a well-prepared home can be done in 2 days. Complex installations with radiator changes, underfloor heating, or difficult access can take up to 5 days.
Do I need to be at home during installation?
Someone should be available on the first and last day at minimum. The survey and handover require your presence. During the middle days, you can leave the installers to work if you prefer.
Can I have a heat pump installed in winter?
Yes, and many people do. Just plan for the 1-2 day period without heating — have portable electric heaters ready. Some installers can keep your old system running until the last possible moment to minimise the gap.
What happens to my old boiler?
Your installer will disconnect and remove the old boiler as part of the installation. The gas supply to the boiler is capped off. If you are fully switching to a heat pump, you may also want to have the gas meter removed, which can save the standing charge (around £100/year).
Do I need to get planning permission?
Most air source heat pump installations fall under permitted development rights and do not need planning permission. The main exceptions are listed buildings, properties in conservation areas, and installations that do not meet noise or size limits. Your installer should confirm this during the survey.
What paperwork do I receive after installation?
You should receive: an MCS certificate (required for the grant and for proving compliance), a Building Regulations notification (via your installer's competent person scheme), manufacturer warranty documents, user manuals, and a commissioning record showing system settings.
Ready to take the first step?
Get free installer quotesMCS-certified installers. No obligation. Typical savings of 30-40% by comparing.
Understanding Heat Pump Installation in Context
Installing an air source heat pump is part of a broader home energy upgrade that may include radiator upgrades, improved insulation, and potentially solar PV to reduce running costs. The Boiler Upgrade Scheme covers a significant portion of the installation cost, while choosing the right system size ensures efficient, comfortable heating for decades. Proper installation quality is the single biggest factor determining whether you join the 84% of owners who would recommend the technology.